
Lots of me and birthday thoughts before the recipe, jump over if you want to head straight to the recipe (no offense taken).
So, it’s my birthday, no. 45, on this gorgeous green planet. I think because I have reached the mid-forties hump I left off the exclamation point on the end. It’s not that I’m not excited, well, I am, just not as much as say my 21st or 40th – twenty-one for officially becoming an adult/feeling “free”, and forty for throwing the feeling of “people pleasing” out the window and embracing the “who cares” approach – just not “BOOYAH!” excited.
However, birthdays are fun.
I love all the extra special perks of breakfast served in bed (fried eggs with toast and sour cherry jam please), dinner out (Thai please), cake, lots of cake (um, yeah). A free Happy Birthday drink (quad espresso over ice – winter or summer) from the fabulous gals at my local Starbucks, “happy birthday!” phone calls with their best wishes, a mocktail made by my thirteen year old (no alcohol mixing for him) and every year since he’s nine (last year a classic “mojito”), hearing my twin boys sing happy birthday along with everyone (a first last year!), birthday lunch with my girlfriends, gathering over plates, and plates of food and drinks, birthday hugs & kisses, notes/birthday cards, and the loving morning birthday kiss from my hubby – the guy who makes my everyday stresses feel lighter with his simplicity. I cherish these moments and am grateful. Very grateful.


And with every birthday, I also try to think like Oprah: “how to do better” and grow within. This time around: I look forward to working on my self-doubt. Being a wife, and a mother of four in her forties, I still have not gotten over that hurdle. Ha! But I have a whole year to work on that right? Yes. I’m on it.
No more self-doubt over:
1. not being able to tackle more than 50 things in a day
2. not being perfect, despite my attempts
3. not having it in me to read bedtime stories
4. not taking blog photos as well styled as other bloggers
5. not being able to increase my running time, no matter how hard I try
6. not spending enough time with my children
7. not giving a sh** when the dishes are piled high, even though I should
8. not being able to please everyone, all the time
9. not charging the battery on my inner-critic every time it runs low
10. not doing enough, even though my husband says I do more than most
There. I said it out loud. Now I can move on and say happy birthday to me, a celebration I am happy to share with my awesome family, close friends and all of you rockstars.
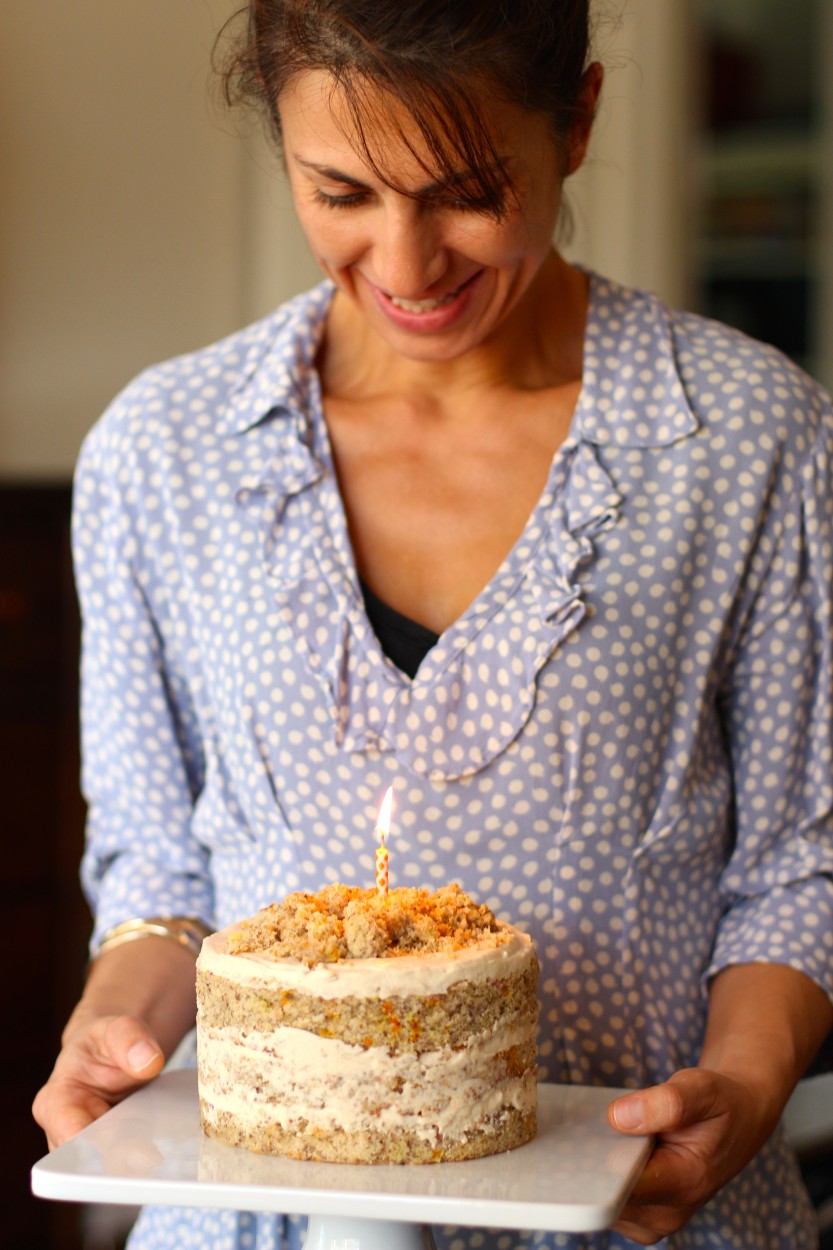
My oldest (he’s 22) asked if he could bake my birthday cake. Without hesitation, I gave him an exuberant yes. My first thought was coconut cake. Or, maybe a chocolate cake with marshmallowy cream frosting, reminiscent of my days after school at 7-eleven buying hostess cakes. Then, as if the birthday cake angels were tapping me on the shoulder, I remembered Momofuku Milk Bar’s birthday layer cake from my days living in NYC. I decided I want sprinkles. Give me sprinkles! So, when I told my son that I want this cake he was amused.
Amused at the fact that I would like such a girly cake, because a) I’m not the girliest of girls b) it has sprinkles, not something the guys in my house ever want for dessert c) that I believed he could pull it off. I knew he could do it.
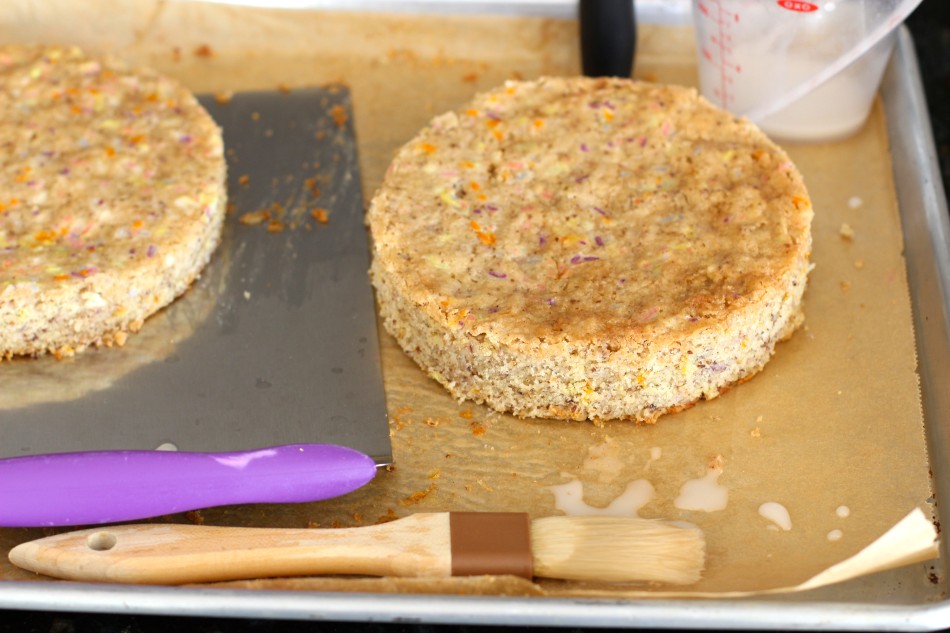
My only peeve is that the dye-free sprinkles lost their color when baked. Kind of a bummer, because I did want those bright girly girl sprinkles but health over dyed sprinkles matters. This is one kick ass cake, my friends. My son out did himself with this tall request and even took prep photos.

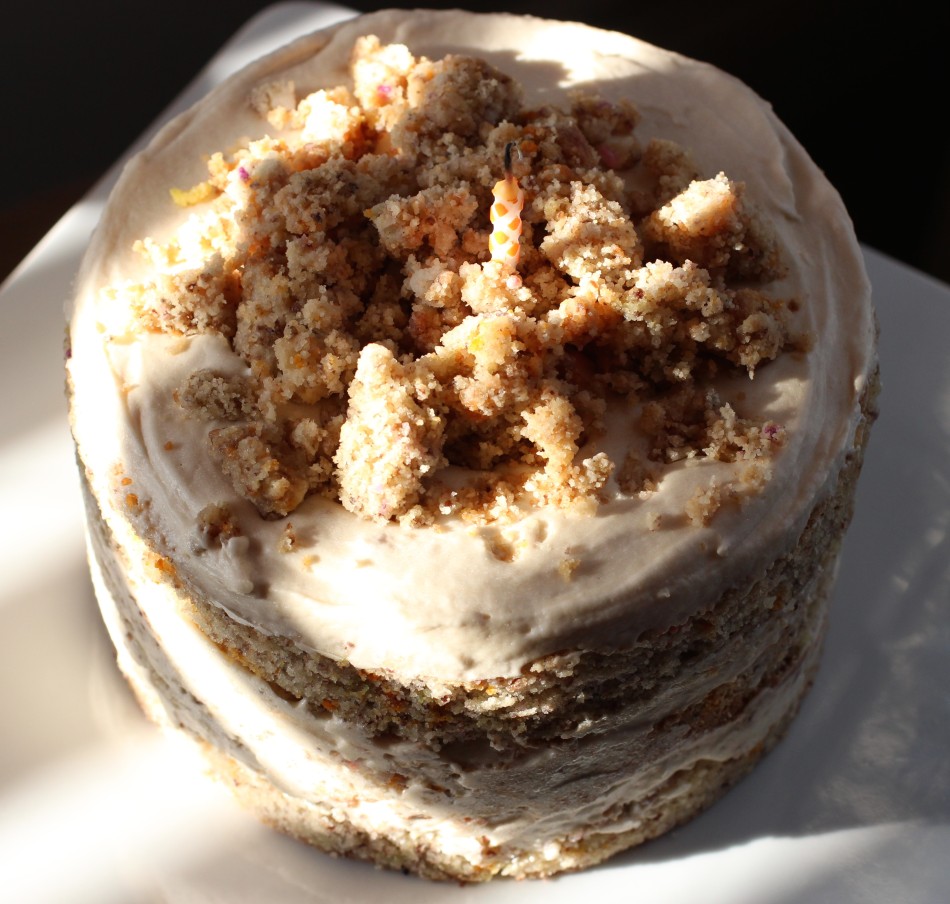
So, let me tell you a little about the cake (gosh, I chewed your ear off already) … it has a burnt sugar flavor to it. Think: chocolate chip cookie dough (without the chips) meets vanilla sugar cookies with a slam of slightly burnt caramel rolled up in one. Need I say more?
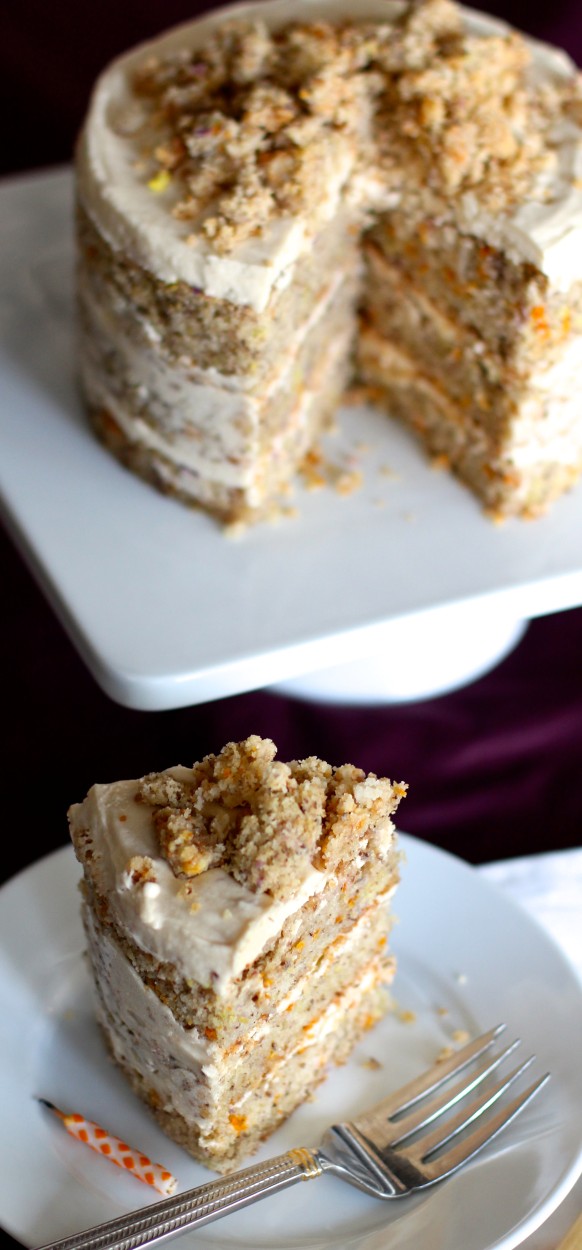
On the technical side: I adapted the recipe as well as the preparation and assembly of the cake to make is less complex for my son (and you if you choose to make it). Also, to create a cake without dyes and preservatives. So, no clear imitation extract, dyed bright sprinkles, and corn syrup. The golden flax seed meal and flax eggs give the cake a carrot cake color – more golden than a white vanilla cake. This was pretty darn amazing, even without the junk I grew up on. Gluten and dairy free, my friends, has never been better.
So that’s the cake.
The frosting does taste similar to the tubs my Mom would buy when I was a kid with a hint of saltiness to it. The acid cuts the overly-sweet taste most frostings have and recently learned that baking powder prevents crystallization. That Christina Tosi is a genius; she’s the lady behind Momofuku Milk Bar in NYC and will gladly copy her technique here-on-in. Then, if that wasn’t enough, there are the cake crumbs on top that crisp up when cooled and leftover cake crumbs with crunch. Yes.
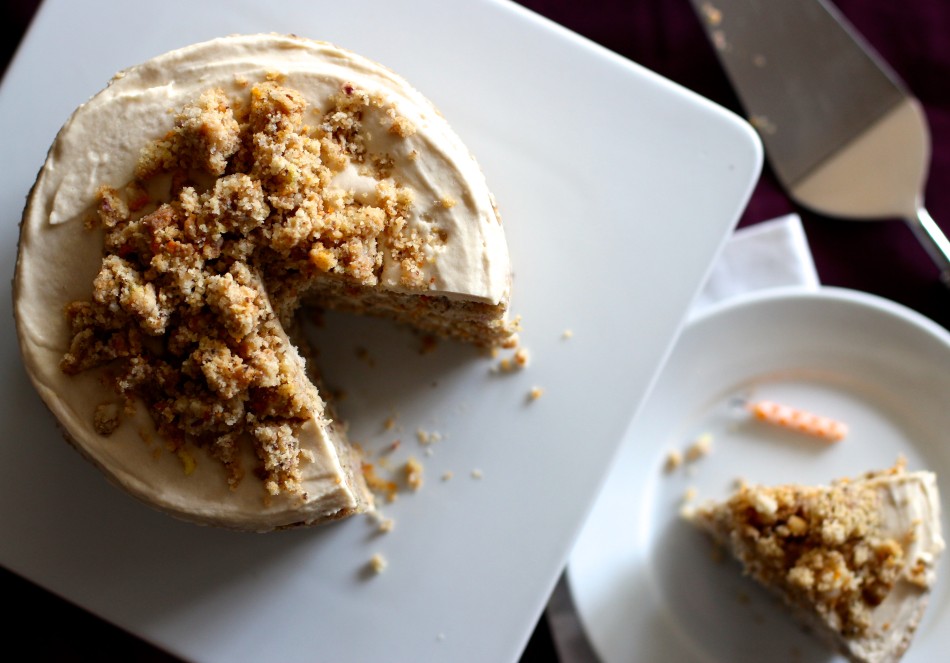
Many components to this cake, but very doable and a good cake to make in advance.
Have a wonderful weekend and if you are celebrating a birthday this weekend “Happy Birthday to you!”
Jessica
The original said to sprinkle one-third of the birthday crumbs evenly over the frosting. use the back of your hand to anchor them in place. He did not do that, instead saved the remaining crumbs (in the freezer for future cupcakes or something).
The original also asked too much of my son (and most home bakers) so I nixed some of the original steps … something about tucking the acetate strip between the cake ring before the final layer.

My son took it out of the freezer at 9AM then let it defrost in the fridge at noon to eat at my birthday lunch. It was incredible and made me feel extra special. It definitely is a labor of love but absolutely worth it.

- Momofuku Milk Bar Birthday Layer
Cake, adapted from here - Makes 1 (6-inch) layer cake, 5 to 6 inches tall. serves 6 - please read through before beginning
- 1 recipe birthday cake (all recipes found below)
- 1 recipe birthday cake soak
- 1 recipe birthday cake frosting
- 1 recipe birthday cake crumb
- Special equipment:
- 1 (6-inch) cake ring, sold here or in baking supply stores
- 2 strips acetate, each 3 inches wide and 20 inches long, here or in baking supply stores
- 9x13 inch baking dish
- 8-inch square baking dish
- .
- .
- For the cake:
- 1¼ cup white rice flour
- 1 cup tapioca starch
- ¾ cup ground golden flaxseed meal
- ¼ cup brown rice flour
- 2 teaspoons aluminum free baking powder
- 1 teaspoon kosher salt
- ⅓ cup plus 2 tablespoons rainbow sprinkles (1 container of India Tree carnival mix dye-free sprinkles)
- ¾ cup coconut or nut milk
- 1 tablespoon apple cider vinegar
- ⅓ cup plus 3 tablespoons grapeseed oil
- 3 teaspoons vanilla bean paste, or extract
- ½ cup palm shortening (I use spectrum organics)
- 6 tablespoons (3 oz) non-dairy soy free buttery spread
- 1¾ cups cane or coconut sugar
- 5 tablespoons light brown sugar, packed
- 3 large eggs
- Egg Free Sub: 5 tablespoons golden
flax seed meal or ground white chia seeds + 3 tablespoons hot water, let sit for 15 minutes) - 3 tablespoons vegan soy free mayonnaise (I use Just Mayo brand)
- .
- .
- Birthday Cake Soak:
- ¼ cup coconut milk, vanilla flavored
- 1 teaspoon pure vanilla extract
- Whisk together the milk and vanilla in a small bowl.
- .
- .
- Birthday Cake Frosting:
- Makes about 2 cups
- 1 stick (4 oz) non-dairy soy free buttery spread
- ¼ cup vegetable shortening
- 3 tablespoons light agave syrup
- 1 tablespoon pure vanilla extract
- 1½ cups confectioners’ sugar, sifted
- ½ teaspoon kosher salt
- ¼ teaspoon aluminum free baking powder (pinch)
- 1 teaspoon pure lemon juice
- .
- .
- Birthday Cake Crumb:
- Makes about 4 cups
- 2 tablespoons cane sugar or raw sugar
- ½ teaspoon aluminum free baking powder
- ¼ teaspoon kosher salt
- ⅛ cup plus 1 tablespoon grapeseed oil
- 1 cup tapioca starch
- Birthday Cake Preparation:
- Preheat the oven to 350°F (175 degrees C).
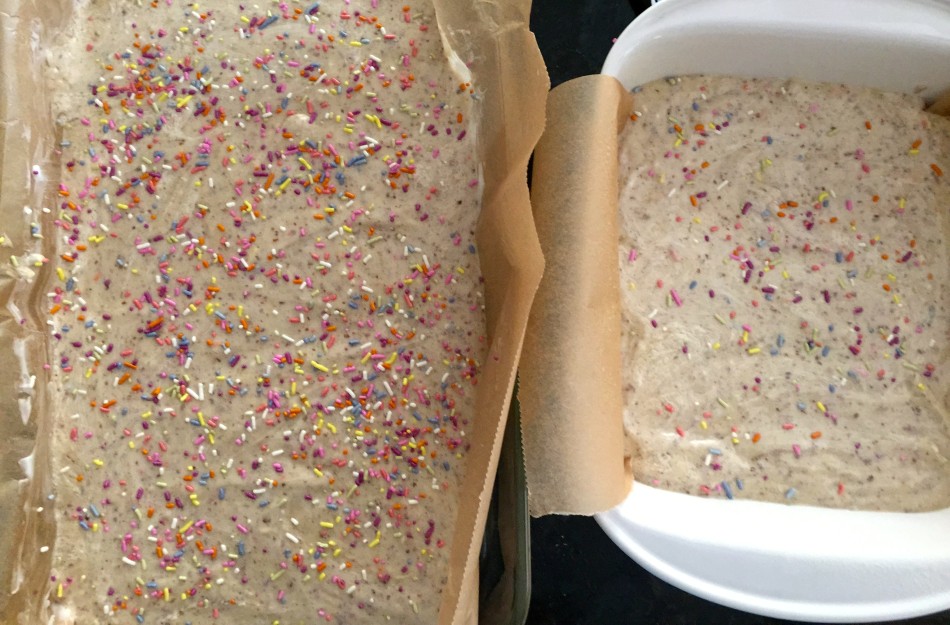
- Grease baking dishes with palm shortening and line with parchment paper, crosswise (the ends will be uncovered).
- In a medium bowl, combine all flours, baking powder, kosher salt, and ⅓ cup of rainbow sprinkles. Set aside.
- Combine coconut milk and apple cider vinegar in a measuring cup, set aside. Do not stir. This is the “buttermilk”.
- In a small bowl combine grapeseed oil, vanilla paste. Set aside.
- In a stand mixer fitted with a paddle attachment, add palm shortening,
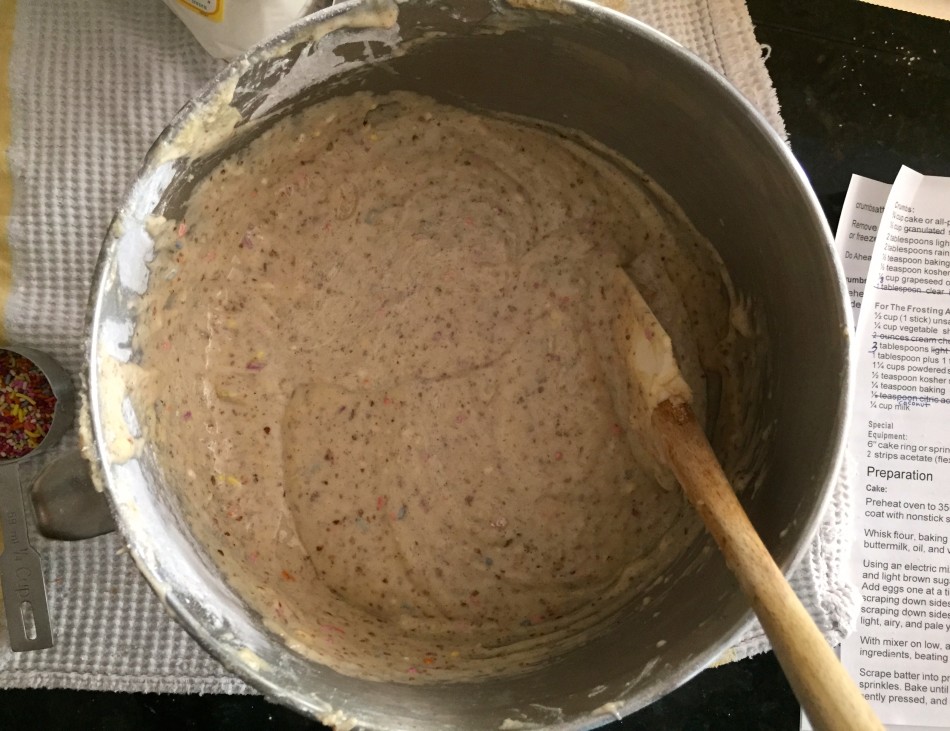
non-dairy buttery spread, cane and light brown sugar. Cream together on medium-high for 3-4 minutes. Then scrape down the sides of the bowl with a rubber spatula, add the eggs, or “flax eggs” and mix on medium-high for 2 to 3 minutes, scrape down the sides once more. - Reduce to low speed, add the “buttermilk”, oil, and vanilla. Increase the mixer speed to medium-high and mix for 4 minutes, until the mixture is practically white (it gets paler after 3 minutes, keep going), twice the size of your original fluffy butter-sugar mixture and fully incorporated.
- Note: Don’t rush the process, you’re basically forcing too much liquid into an already fatty mixture that doesn’t want to make room for that liquid so this step will take more time than most batters. There should be no streaks of fat or liquid when done. Stop the mixer and scrape down the sides of the bowl.
- Turn back on to low speed, add the dry blend and mix for 30 seconds, just until your batter comes together. Scrape down the sides of the bowl, then
pour into greased baking sheets. - Spread cake batter in even layers (two-thirds in the large and ⅓ of it in the small square dish). Sprinkle remaining rainbow sprinkles evenly on top of the batter.
- Bake for 30-35 minutes. The cake will only rise slightly. At 32 minutes, test for doneness using a toothpick. It’s ready when it comes out with slight crumb, not wet. Add 2-3 minutes, if needed. Check again.
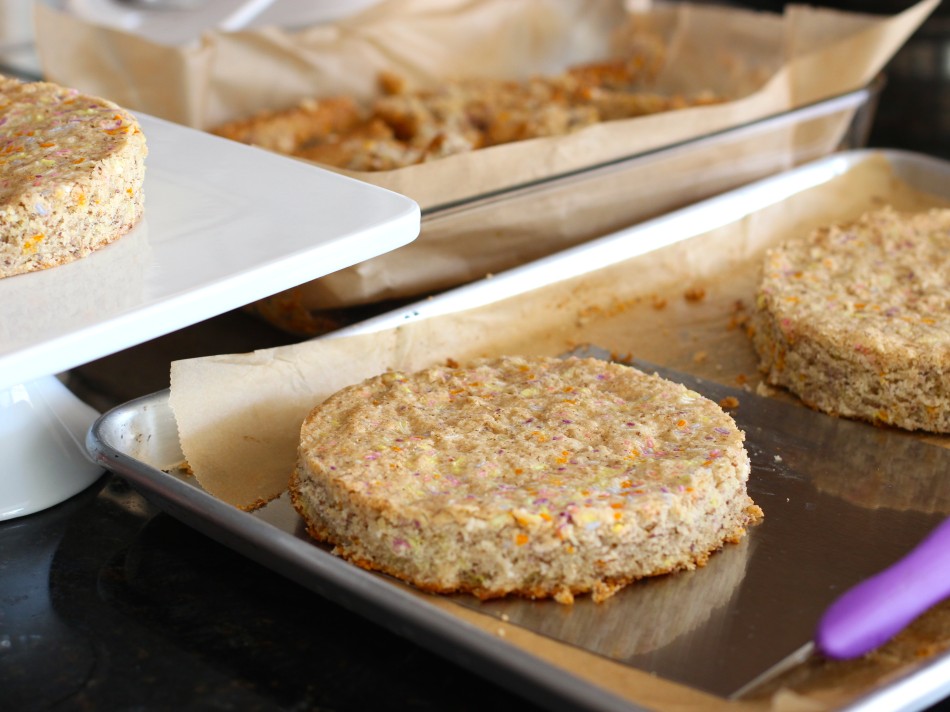
- Take cake out of the oven (reduce oven temp to 300 degrees F for making cake crumb) and cool in its' pans for 20 minutes, then refrigerate for 2 hours or freeze for 1 hour (uncovered).
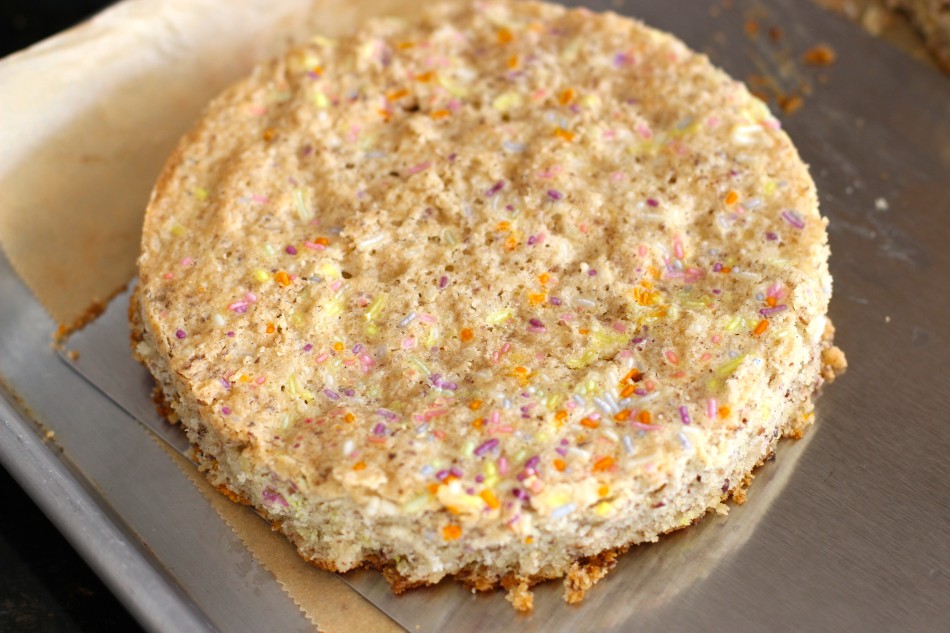
- While holding the parchment paper, lift out the cake and gently transfer onto a half size baking sheet or any freezer safe pan (s) that will hold the three layers. Use the cake ring to stamp out 3 circles from the cake. Twisting the cake ring will help get a clean
cut-through . - Meanwhile, make crumb and frosting (see both preparations below), set aside.
- Then, using a pastry brush, give the cake layers a few generous brushes of the birthday cake soak (see recipe, used about ⅛ of a cup total of the ¼ cup he made).
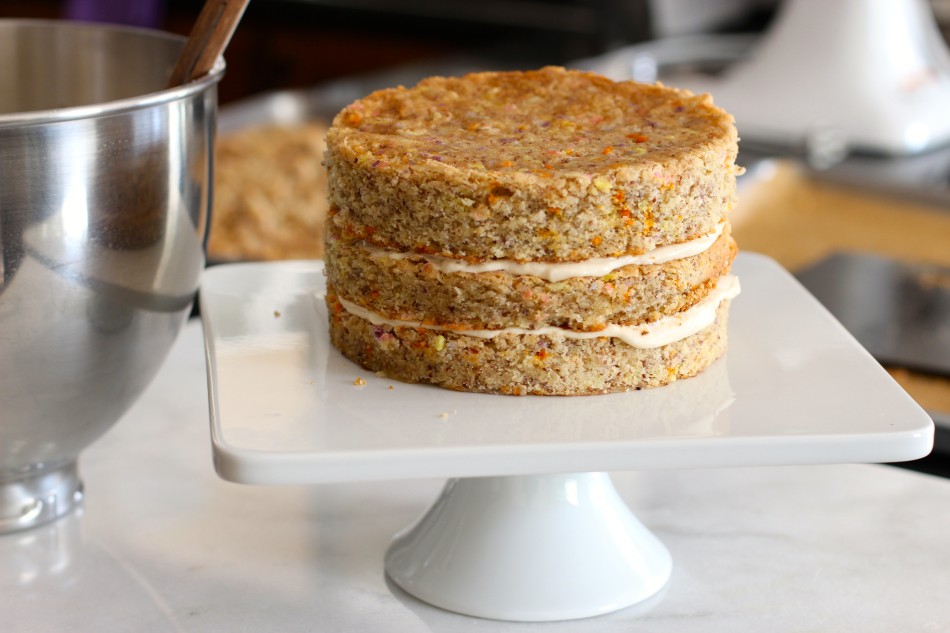
- Place the first layer on your plate or cake platter. Using an off-set spatula spread a quarter of the frosting (see recipe) in an even layer over the cake.
- Gently transfer the second layer over the frosted first layer.
- Frost the second layer with another quarter of the frosting, spread evenly.
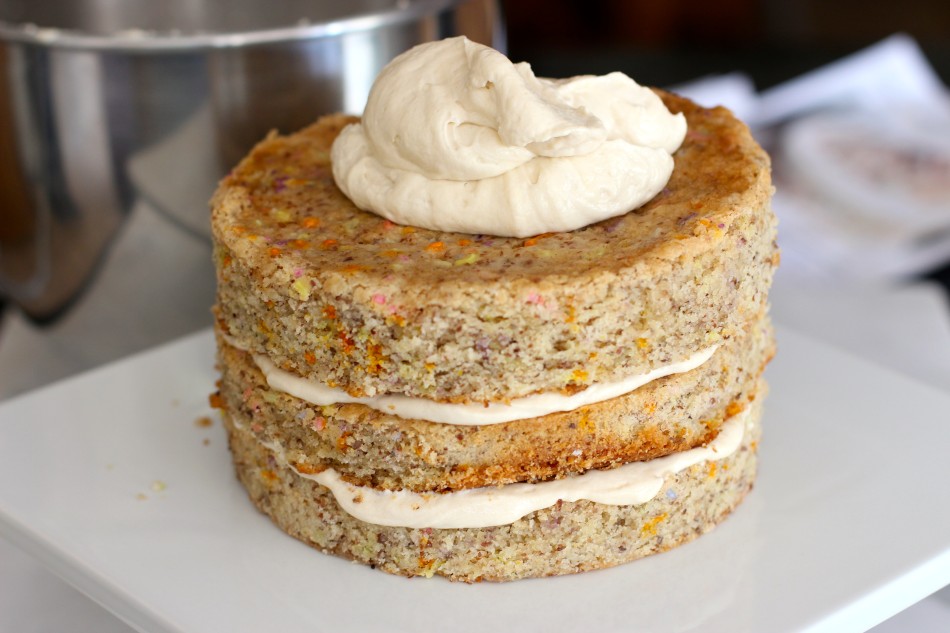
- Gently transfer the final cake layer and spread the remaining frosting. Garnish the top with the birthday crumbs (had about 2 cups of crumbs left over that we froze) then wrap the cake with acetate lining (food grade plastic strips) and tape so the lining will hold the cake in shape.
- Freeze (make sure your cake platter is freezer safe) for a minimum of 12 hours to set the cake and filling. The cake will keep in the freezer for up to 2 weeks.
- Note: It was in the freezer overnight (uncovered) then frosted with added cake crumble the next day while it sat at room temperature. The cooled cake can be stored in the fridge, wrapped in plastic wrap, for up to 5 days.
- Remove from freezer and gently pull off the acetate lining at least 3 hours before you are ready to serve the cake. Defrost in the fridge for another 1-2 hours (wrapped well in plastic, the cake can be refrigerated for up to 5 days). Serve slightly chilled.
- Birthday Cake Crumb Preparation:
- Preheat the oven to 300° degrees F (149 degrees C)
- Combine the sugar, baking powder, salt, and oil in medium bowl. press together with a fork until you have a thick, hard to mix paste, then add tapioca starch and combine well. Add the blend to the cake crumbs (spread out on the baking sheet) and squeeze clumps together to form various sized clusters.
- Bake for 15-20 minutes. Let crumbs cool completely before using. Note: If making ahead, store in an airtight container, the crumbs will keep fresh for 1 week at room temperature or 1 month in the fridge or freezer.
- Birthday Cake Frosting Preparation:
- In the bowl of a stand mixer fitted with the paddle attachment combine the buttery spread, and shortening and cream together on medium-high for 2 to 3 minutes, until the mixture is smooth and fluffy. Scrape down the sides of the bowl.
- Then reduce speed to lowest speed, stream in agave, and vanilla. Increase speed to medium-high and beat for 3 minutes, until the mixture is silky smooth and a pale cream color. Stop and scrape down the sides of the bowl and bottom to fully blend.
- Turn back on to low and add the confectioners’ sugar, salt, baking powder, and lemon juice and mix on low speed just to incorporate them into the batter. Increase speed back to medium-high and beat for 2 to 3 minutes, until you have a beautifully smooth off-white colored frosting. Use the frosting immediately, or store it in an airtight container in the fridge for up to 1 week.
- Note: A cake layer lifter, found at baking or craft supply stores makes lifting layers easy or use a wide spatula.
- Note: The original recipe says to take the remaining crumbs (from these 2 cut outs) and put them in the acetate lined cake ring and press them together to form the bottom layer. I told my son not to bother since there isn’t any gluten to “glue” it together (hence the additional baking dish).
- To make ahead: freeze the cut out layers and bake the crumbs, then freeze. Make frosting and assemble same day.
Don't miss a recipe! Subscribe here.


 Based on 3 Review(s)
Comments