(Updated 12/29/2015: After baking these red velvet crinkle cookies this week I made a few changes to the recipe to make things quicker (no more rolling balls) and better like adjusting food coloring for less of a muted color, along with recipe changes (see recipe and notes below) such as flour blend and omitting coconut yogurt. I love the “new and improved” results and not having to roll 4 dozen balls is very improved and very much loved!)
To conclude my Oatmeal Cranberry post here is the next recipe of my holiday cookie trio. This red velvet crinkle cookie recipe was new for me being that I haven’t used natural red food coloring before or red velveted anything. Fortunately, a risk work taking – I know, just before the holidays, crazy – but they came out spectacular. I saw this recipe on Pinterest (gosh I love that place) from blogger Cooking Classy, and thought I must adapt that recipe. But I wanted to take it a step further by also making it egg free, for my hubby who is cutting back on eggs. The rest for gift giving. So I made two batches, one egg free and one with eggs. My trio of holiday cookie gifts also includes ginger cookies, another one perfect for cookie exchanges or gifting …
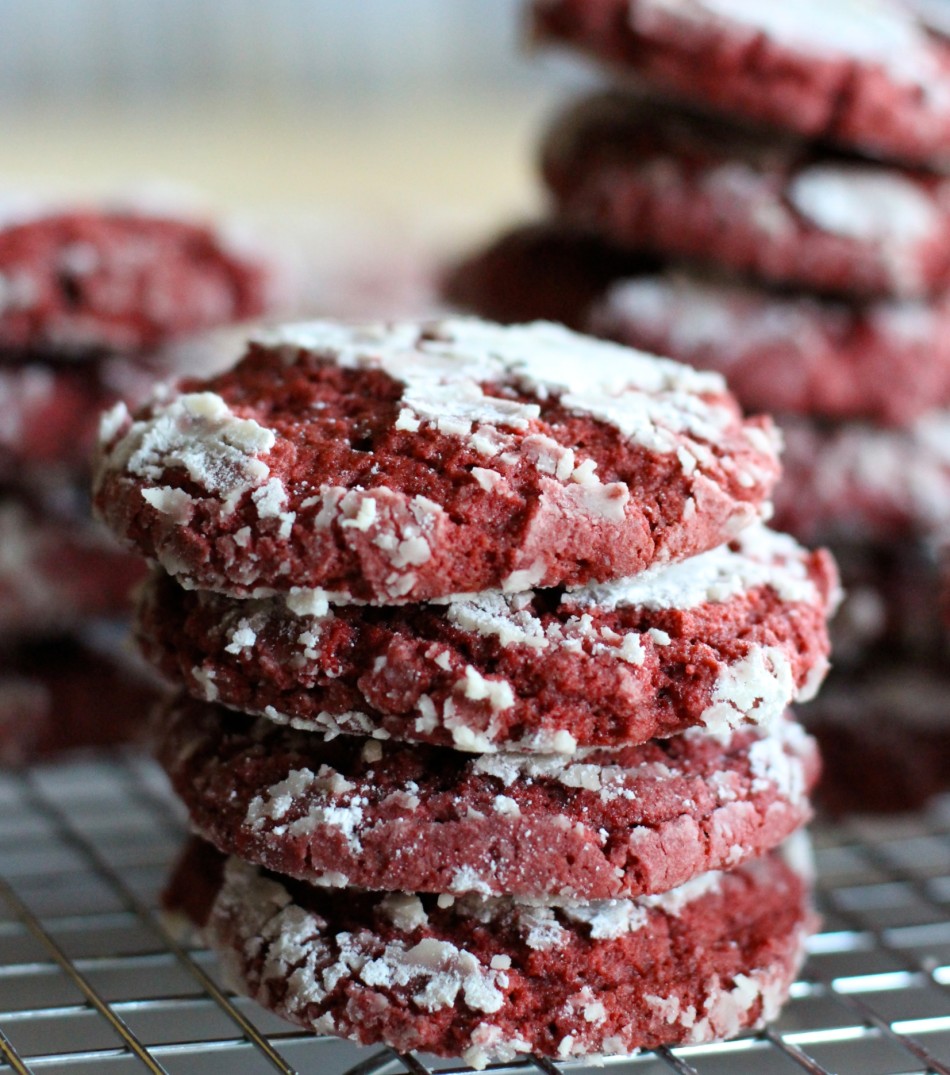
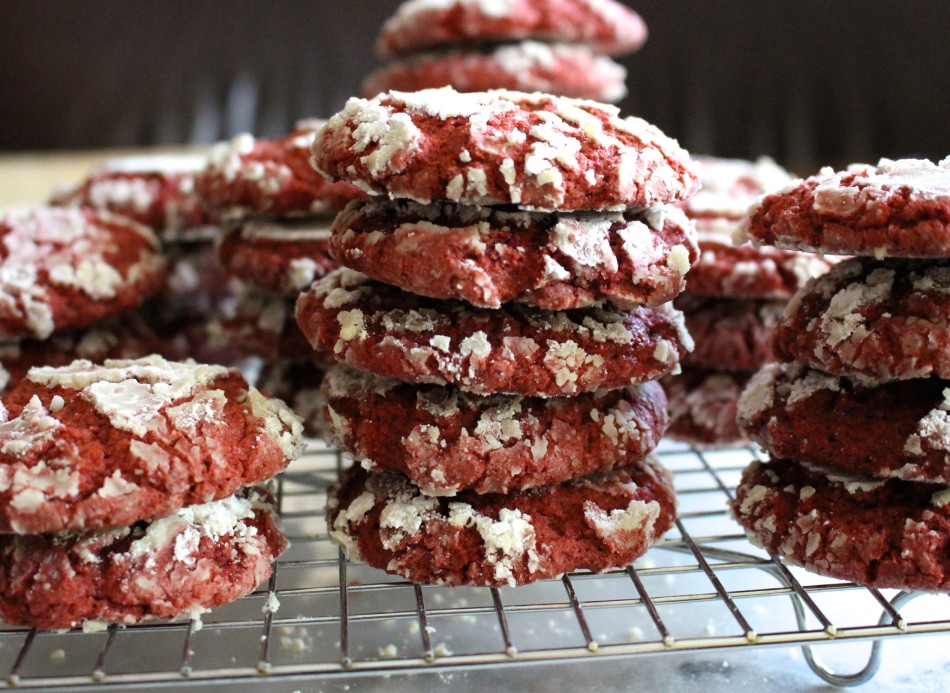
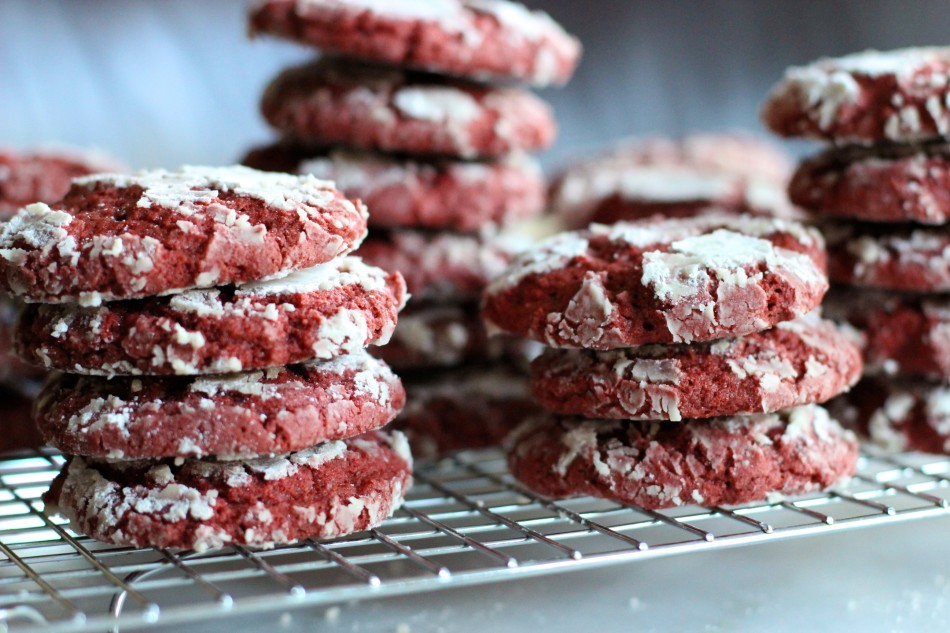
As you probably know by now, I don’t like to use artificial dyes. I know it makes things really pretty with those really bright colors and all, but it’s just not in me to use them. These red velvet crinkle cookies are not as bright as traditional red velvets, but they sure taste exactly like a red velvet and all the little cookie monsters in my house seem to agree. They think I didn’t notice those missing cookies on the rack, ha!

Soft and chewy on the inside with chocolate chip crunch for texture (you can leave chips out if you prefer but I can’t imagine why) and crispy on the outside. Red velvet crinkle cookies are my new cookie recipe success. Hooray! The vegan cookies are slightly softer than the egg version so if you are shipping them be sure to pack them individually and bubble wrap around each as they are more fragile. You know how baking experiments can be. Ugh, God knows I have had my share of those on this allergen-free journey.
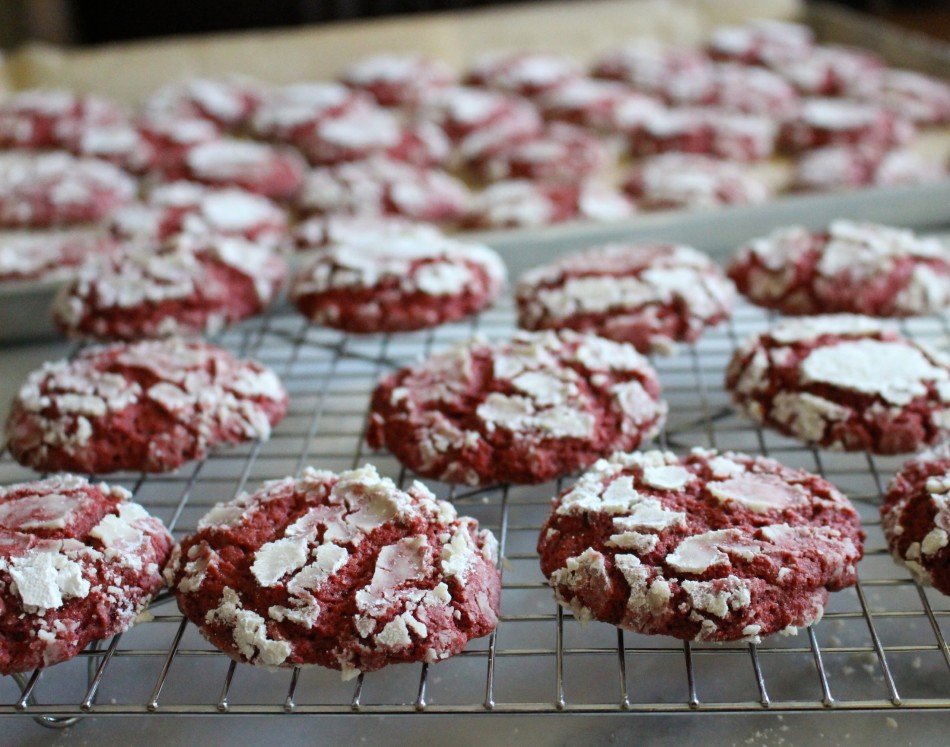
UPDATE, as noted in the recipe: These were made without rolling each into a ball … just scooped and dunk. Same results with less prep time.
Note: Dough can be frozen in an airtight container up to a month


The vegan cookies look similar to the egg version but are slightly softer, so if you are shipping them be sure to pack them individually, and bubble wrap around each since they are more fragile. You know how allergen-free baking experiments can be. God knows I have had my share of those on this allergen-free journey.
Give this recipe a try and let me know what you think. I thought they’re pretty darn good and so pretty to give. Enjoy!

- 3¼ cups Bob’s Red Mill Gluten Free 1-to-1 baking flour
- ¼ cup cocoa powder
- 1 tablespoon aluminum free baking powder
- ¼ teaspoon aluminum free baking soda
- ½ teaspoon kosher salt
- 6 oz. (1½ sticks) non-dairy butter (I use Earth Balance Soy Free Buttery Sticks), at room temperature for 15 minutes
- 1¼ cup cane sugar
- 2 extra large eggs
- Vegan option: ½ cup chunky applesauce (strain liquid if very watery)
- 1 teaspoon pure gf vanilla extract
- 2 teaspoons fresh lemon juice or apple cider vinegar
- 1 - 1½ tablespoons natural red food coloring (I use India Tree)
- 1 cup dark chocolate chips (optional, I use Enjoy Life chips)
- 1 cup powdered sugar (Wholesome brand is vegan)
- In a bowl combine flour, cocoa powder, baking powder, baking soda, and salt. Set aside.
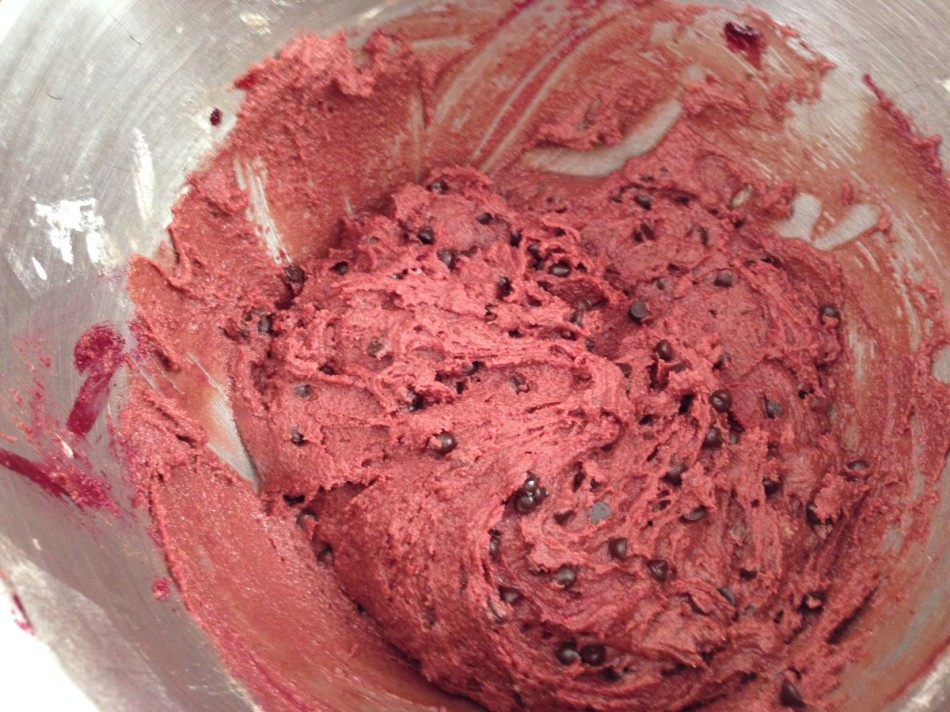
- In a stand mixer set with the paddle attachment on medium high speed, beat non dairy butter and sugar until light and fluffy, about 2 minutes. Reduce to low, then add applesauce ¼ cup at a time, scraping down the sides of the bowl as necessary until well combined. Add vanilla extract, lemon juice or apple cider vinegar, and food coloring. Turn off mixer and stir and scrape down sides of bowl, then turn it back on to medium speed.
- Slowly add the dry ingredients and mix until most of the dry blend has combined. Turn off mixer and fold in chocolate chips.
- Cover dough with plastic wrap and refrigerator for at least 2 hours until dough is firm.
- Preheat oven temperature to 350 degrees F once removing dough from the refrigerator. Prepare baking sheets lined with parchment paper, or silpat - about 16 cookies per baking sheet.
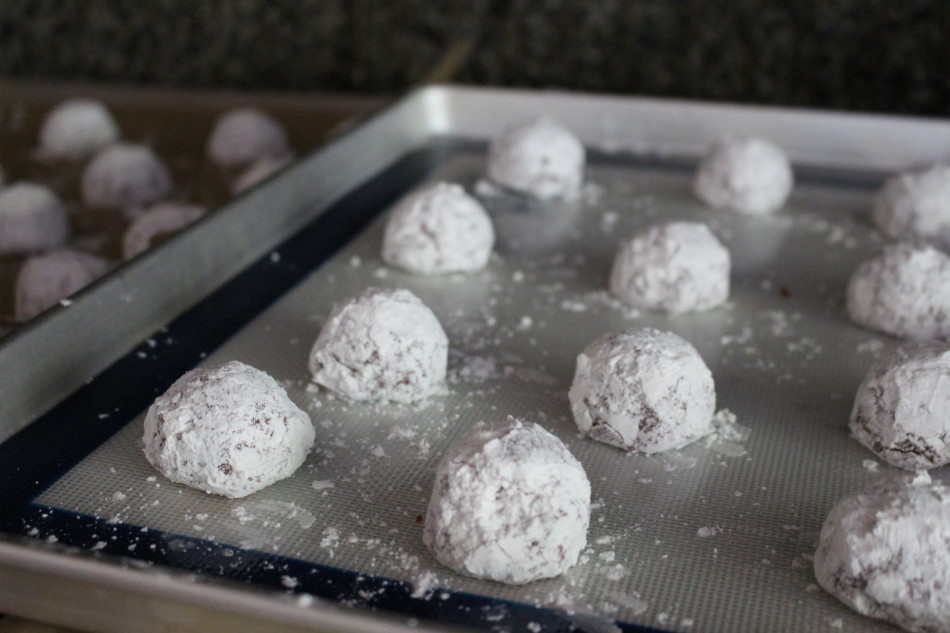
- Using a mini ice cream scooper, (or just eye ball it to about 2 tablespoons) scoop cookie dough and place onto lined baking sheets. When all the dough has been scooped prepare a bowl of powdered sugar then coat each with powdered sugar doing a double dip to ensure a good generous coating of powdered sugar for a nice crinkle effect.
- Note: in the past I would roll each scoop into a ball then coat and press before baking. In my attempt to save time this year I skipped the rolling part and see it’s not necessary. The cookies will still be as pretty as ever without the additional rolling time.
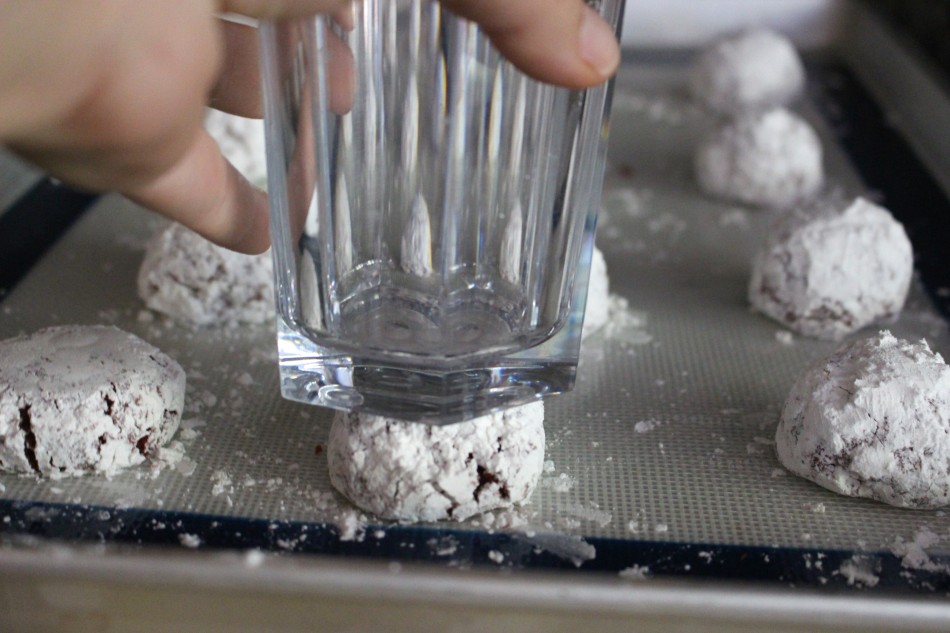
- Place the coated cookies back on the parchment-lined baking sheets. Gently (and very slightly) press down each cookie using the bottom of a glass or your palm. Bake for 9-11 minutes (add another minute for vegan cookies). The cookies will appear very soft but will firm up when completely cooled.
- Let the cookies rest on the baking sheets for 15 minutes or so, do not try to remove them while hot or they will fall apart. Transfer to a wire cooling rack to cool completely before storing. Store in an airtight container for up to 3 days at room temperature or a week refrigerated. These freeze well for up to a month in a freeze-safe container with parchment paper lined between rows of cookies.
- Note on freezing dough:
- I wrap my dough in wax paper (parchment paper will stick to the dough), put it into a freezer safe zip lock bag, then freeze. I thaw it in the refrigerator overnight then leave it on the kitchen counter (away from sunlight) for an hour or so before baking. I find some of my best cookies are made from frozen dough left in the fridge overnight. If it’s a new recipe (like this) I will bake part of the dough the same day and freeze the rest to compare cookies.
- Note on powdered sugar coating:
- The first time I made these I found the ones I coated really well looked the prettiest. The ones that I lightly coated melted into the cookie, not very "crinkly" looking.
- Note on oven temperature:
- For consistently perfect cookies I strongly suggest you keep an oven thermometer in the oven, actually not just for cookies, everything! It is one of the best tools to have!
- Note on flavor: Placing cookies directly onto aluminum pans can leach metallic flavor onto your foods, it also will absorb the neurotoxin aluminum. We certainly don’t need that.
Don't miss a recipe! Subscribe here.

Comments