 Hey! Before we talk butternut squash things I wanted to share our Paleo experiment with you. Scroll down to the recipe if you came for the food. 🙂Remember back in September, I mentioned giving the Paleo diet a try? We did. Not die-hard though, more Paleo-ish, since I still used non-dairy cheese and cane sugar a few times a month to satisfy cravings and to keep pissed-off feelings to a minimum. Kidding aside, special needs inspires a very, very special love. I’m blessed to have two older sons’ who fully support our journey towards better health AND who are truly the best siblings and sons’ a Mom could ask for. This journey isn’t easy and their support for Mom’s trials and errors means the world to me.
Although most go Paleo because of autoimmune issues, I was propelled to give it a try for inflammation and GI issues (leaky gut and microbial disorders). Why not give it a try if it can help Michael and Ely. It wasn’t easy to integrate Paleo into our diet (read: we love our carbs big time) since it made our list of ‘no’s’ even longer. The biggest challenge was creating school snacks and hearty lunches for my guys. I personally missed having toast in the morning, tortilla chips, and cookies, big fat tahini chocolate chip cookies.
I think what made the diet really hard for us was eliminating nuts (high oxalates) and eggs (oldest son is allergic), and we don’t eat dairy, so no grass-fed butter either — all common ingredients in Paleo cooking/baking. Plus the extra time needed to make everything from scratch was hard because of a) Paleo store-bought products either cost double the crazy expensive price of gluten and dairy free b) couldn’t find c) contains an ingredient someone in the house is intolerant to. BUT. We did it. For four months.(!!) Before we started, I planned a week of meals to take the stress out of what to cook — with all the restrictions, I needed a plan!
SO. Did I see any results? I did, but not what I expected. What I didn’t take into account was Michael and Ely’s mitochondrial disorder. After a couple of months, I noticed their jeans were slipping off and both were as lethargic as when they drank milk and ate gluten years ago. Their attention span got worse and blood work revealed very low cholesterol levels and low blood count. I didn’t connect the dots that maybe this type of diet is not for my guys. I got so focused on their guts and behavioral issues that I overlooked their metabolic disorder. Thinking about calories, I baked bread with tons of eggs and sweet potato mash hoping the complex carbs would give them the boost of energy (and cholesterol) they needed. The bread was a hit, and they ate loads of it, but shortly after my husband and I noticed new behaviors and bowel issues — the high amount of eggs were too hard to digest properly. It felt like our efforts were making things worse for them. Time for Plan B. For the rest of us, we didn’t see much of a change health-wise other than losing a few pounds and crankier humans. Losing a few pounds didn’t make me cranky. HEHE.
Reintroducing legumes and quinoa helped the twins’ gain some weight back and bring back their energy. Removing rice (albeit organic, nevertheless) may have been the best discovery on this journey. I noticed more focus, attention, and speech. Albeit, organic, it may have been too much starch, too often — in baking flours, store-bought snacks, foods, everywhere. We will still eat rice but will definitely be more mindful of amounts and not use it regularly. Looking back, I also noticed cassava flour (popular rice flour substitute) made my boys’ act like they had gut yeast overgrowth — giggly for no reason, trouble sleeping at night, itchy in their private parts, and climbing furniture — all telltale signs that we had a gut flora issue.
Overall, I’m still glad we gave it a try. As much as I hoped we could reap the rewards that many have felt with a Paleo diet, it wasn’t what our bodies needed. A gluten, dairy, and soy free diet have been beneficial, along with low-oxalate, low phenol, mostly nightshade free, and occasional grains and legumes — it’s the combination that works for us.
So that’s the scoop.
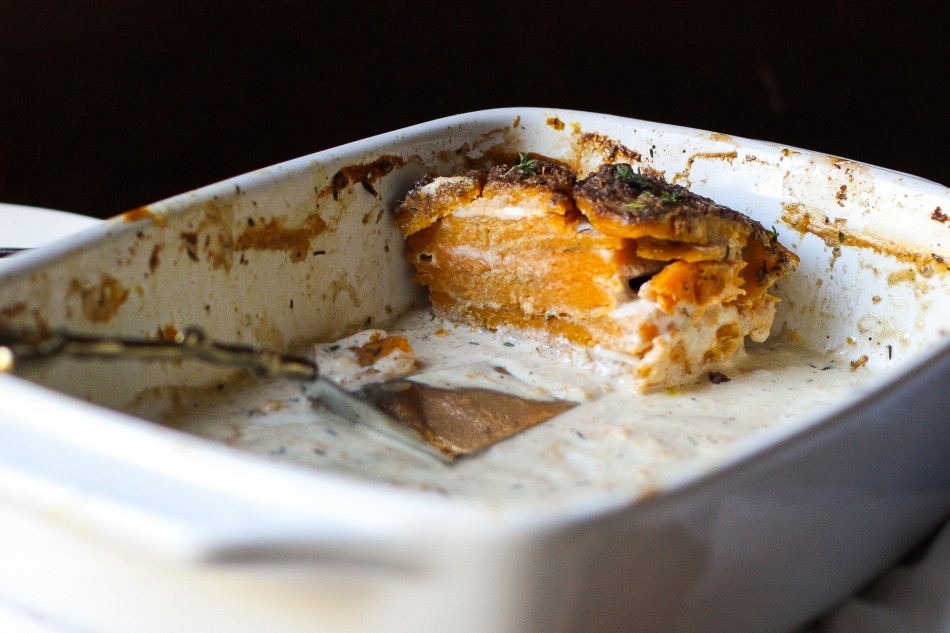
OK. Now that I went on long enough about my glamorous life in diet, let’s move right along to bright orange food. Just look at that gorgeous color!

This is such a happy-feely butternut squash dish with sweetness, creamy, savory – all in one. I know we think of butternut squash as a fall season food, but why wait until the fall to enjoy this? It has a delicacy and lightness to it that pairs wonderfully with spring vegetables.
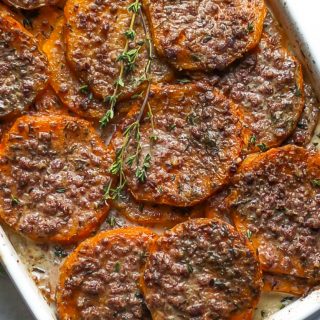
The sweet butternut squash gets a savory flavor from the seasonings — no need to go with fresh, dried seasonings do just fine — with all the comforts of a creamy bechamel inspired sauce without feeling heavy. Despite the amount of coconut cream used, it doesn’t have any hint of tropical coconut flavor and gives the nutty sweet squash a richness without feeling heavy.
In addition to a dinner side dish, why not serve this festive dish at brunch along with savory breakfast dishes? It’s dead-simple to put together and reheats beautifully. I added some crushed nuts on top for a crunchy texture, but feel free to omit if you prefer without. This is another one of those dishes that can be made ahead and keeps well in the refrigerator for days. Gotta love that.

- Makes one medium-sized casserole dish
- 3 medium butternut squash (about 6 pounds)
- 1 tablespoon dried thyme
- 2 teaspoons garlic powder
- 2 teaspoons plus 1 tablespoon(for water) kosher salt
- 1 teaspoon ground sage
- 1 teaspoon ground nutmeg
- 1 teaspoon crushed black pepper
- For the ‘cream’ sauce:
- 2 15-oz cans coconut milk
- 1 tablespoon coconut oil (or other neutral oil)
- 1 tablespoon garlic powder
- 1 teaspoon onion powder
- 1 teaspoon ground sage
- 1 teaspoon kosher salt
- 1 teaspoon crushed black pepper
- ½ teaspoon ground nutmeg
- 1 teaspoon gelatin (or agar agar powder, for vegan version)
- For topping:
- 2 tablespoons coconut oil
- ¼ cup ground hazelnuts, cashew, macadamia or almonds (walnut is bitter tasting)
- 1 tablespoon oil for greasing casserole dish
- fresh thyme leaves and sage for garnish (optional)
- Preparation:
- Prepare a medium-sized oven-safe casserole dish
- Peel and cut the butternut squash in ¼ inch width circles and half circles of the seeded section. Note: when cut, the squash releases sappy-looking enzymes that stick to the skin with an uncomfortable tightness, wear gloves or try to avoid touching the released liquid. Set aside.
- Prepare a pot (large enough to fit your slices) with water and set on high heat to boil. Meanwhile, prepare spices for the butternut squash: thyme, garlic powder, 2 teaspoons kosher salt, sage, nutmeg, and black pepper. Set aside.
- When water is boiling, add the tablespoon of kosher salt and slices of butternut squash. Blanch for 5-7 minutes or until slightly soft (soft but should still have some firmness to it when lifted out of the pot). When ready drain and set aside until cooled enough to handle.
- Meanwhile, prepare ‘cream’ sauce: combine coconut milk, coconut oil, garlic powder, onion powder, sage, kosher salt, black pepper, and nutmeg, set on medium-high heat and whisk to combine well. When it comes to a rolling boil reduce heat to medium (watch carefully, reduce sooner, if needed, to prevent coconut milk from bubbling over) and continue to cook 5 minutes, whisking occasionally.
- Sprinkle gelatin or agar agar over the sauce as you whisk vigorously, continue to whisk vigorously for another half a minute to prevent clumping. Reduce to simmer and continue cooking for another 2-3 minutes. You will know it’s ready when it creates a thick film on a spoon that won’t run when you run your finger down the back of the spoon. Remove from heat.
- Layer slices of butternut squash in the greased casserole dish, beginning with any odd shapes and half-circle pieces. Evenly sprinkle herb mix over each butternut squash layer. Once completed, pour hot ‘cream’ sauce over the layers. It should come up to the top layer but not cover completely. Combine coconut oil and nut, then sprinkle over the top layer. Optional: sprinkle some fresh thyme leaves across the top for garnish.
- Bake at 350 degrees F convection for 30-35 minutes. Let it cool for 30 minutes before serving (the inside is brutally hot!). Even better the next day, giving it time for the ‘cream’ sauce to seep into the squash layers. Will remain fresh refrigerated for 3 days.
- Note: The gratin will appear very thick when refrigerated, once reheated the sauce will thin out.
- For freezing: cool completely at room temperature (at least 3 hours) before freezing. This gratin freezes very well when plastic wrapped several times (around the perimeter of the dish, not just the top) then completely wrapped with aluminum foil. Can be frozen for one month.
Don't miss a recipe! Subscribe here.


 Based on 5 Review(s)
Comments